


Contact Us: info@monaequipments.com
Mona + Plus Doctor Blade ( MDB -SUPER )
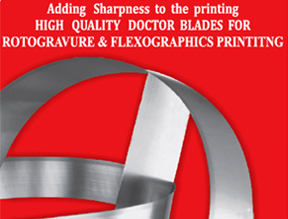
HIGH CARBON STRIPS
MDB - SUPER is the highest in quality among all other doctor blades. It has a highly refined microstructure blade with better heat treatment and chemical composition. These blades have double carbides compared to MDB–STANDARD. The base material is made from genuine European steel. This blade has low friction for long running with minimum downtime.

Advantages
- High density and Ultra Refine Swedish and German steel
- High Corrosion and wear resistance
- Low Anilox and gravure cylinder wear
- A Highly improved microstructure releases smaller particles into inking system
- This Blade gives Ultra Durable long Life for Printing etc..
- SAVE TIME AND MONEY
- Minimize Error with wrong setting alignment
Specifications
| Application | Rotogravure & Flexographic printing, Lamination & Coating and Water base ink coating. |
| Materials | High quality carbon steel |
| Hardness | 598 HV |
| Tensile Strength | 2030 N/ mm |
| Blade Width | 10 mm to 100mm |
| Packing | Roll in dispenser box (easy to use) |
| Length | (i) Coils 100 meter or 50 meter ( Other meter as customer requirements) (ii) Pre- cut length ( No joints in any coil). |
| Thickness | (0.10 , 0.15 & 0.20 ) mm |
| Lamella (Tip) | 1.2mm, 1.3mm, 1.4mm & 1.7 mm |
| Lamella ( Tip) Thickness | 60 micron to 120 micron |
| ELONGATION | 3 TO 5 % |
Chemical Composition
| Carbon | 1,00 |
| Silicon | 0,25 |
| MN | 0.40 |
| P max | 0.015 |
| S max | 0.004 |
| Cr | 0.14 |
Technical Specifications
ROTO GRAVURE
- Proper Mounting and Usage of Mona + plus Doctor Blade on the printing press ensure that you get the longer life excellent wiping action from the doctor blade
- The blade holder must be clean at all times .No ink sedimentation between the Blade and the blade holder should be permitted
- Use a counter/support blade from 0,5mm thickness, preferably a stainless or CARBON Strips type
- Cut the counter/support blade at ends to 45 degree angle. (To reduce wear from printing cylinder ends)
- Make sure the doctor blade is mounted straight in holder, so no waviness is observed. Check along the blade from the side
- When bolts/screws are used for clamping blade holder, tighten from center bolt/screw and outwards crosswise. Use a torque-wrench if possible. Check so all treads are OK and that no bolts/screws are missing
- Use measuring tape or other precise measuring tool for setup of blade extensions. (Preferably use fixed end-stops/pins in bottom of the blade holder clamping area)
- Check doctor blade edge for damages by lightly running your finger nail along the blade edge. Be careful, it's sharp!
- Attach the doctor blade holder securely to machine.
- Try to achieve a 55-65 degree contact angle between doctor blade and cylinder (less doctor blade pressure is needed)
- Use a blade pressure of 0,5-1,2 bar, increase more if there is no clean wipe, but try to use as low blade pressure as possible. (Less blade flex and blade/cylinder wear)
- Set blade oscillation to 20-30mm. If your machine doesn't allow that long stroke, use the max stroke length. Make sure oscillation stroke is smooth. No jerks or stops
- If there is a need to use a slur-stick, use one with a very sharp tip. Then only low pressure force is needed. Recommended is to use a round wooden stick that can fit into a pencil sharpener for re-sharpening
The support Blade must be clean and uniform the and should be mounted on top of the doctor blade as shown above figure . To permit flexibility and proper lubrication , the thickness of the support blade between 0,5 mm .
The Distance between the doctor blade tip and the doctor blade tip should be between 3-5 mm .
Flexo Settings
Use a high quality doctor blade with dimensions suitable for your ink and anilox type.
- Check your doctor blade chamber/holder so it is straight, clean and without damages, especially in the clamping area
- If screws/bolts are used for clamping; make sure all screws/bolts are present and that threads are in good condition both on screw/bolt and in chamber/holder
- Make sure the doctor blade is mounted straight and that no waviness in the blade is observed
- If a chamber with end seals is used, let the doctor blade length reach 50-70% onto the seal width
- When screws/bolts are used for clamping chamber/holder, tighten from center and out crosswise
- Check so doctor blade extensions are correct
- Examine doctor blade edge for nicks by lightly running your finger nail along the blade edge. Be careful, it’s sharp!
- Attach the doctor blade chamber/holder securely to machine
- Check so your anilox roll is clean and in good condition
- Make sure chamber is aligned to anilox roll, both vertically and horizontally
- Apply lowest chamber/holder pressure needed (less doctor blade flex and blade/anilox wear). Only press so camber doesn’t leak and doctor blade wipe correctly at production speed.


Related Products
Type of Edges
- Bevel
- Lamella
- Round
Industry Use
- Rotogravure
- Flexographic Printing
- Waterbase Coating & Lamination
- Paper, Foil, Pad and Textile